Deploy a New Task

Create a Spheron Key, either set it up in your Koii Node App, see tutorial, or if you prefer set it up from CLI using Spheron API. If you already have the key setup in the Koii App you can find it in settings. , copy the token, and paste it on this prompt.
Getting Started:
- To deploy a new task, select the following option:
? Select operation › - Use arrow-keys. Return to submit.
    Create a new local repository
❯   Deploy a new task
    update existing task
    Activate/Deactivate task
    Claim reward
    Fund task with more KOII
    Withdraw staked funds from task
    upload assets to IPFS(metadata/local vars)
- There are two options to deploy a new task, the next prompt asks you to select how you want to deploy your task:
? Select operation › - Use arrow-keys. Return to submit.
❯   using CLI
    using config YML
For deploying a task, it's recommended to use the using config YML option, which offers a more structured approach and contains comprehensive information about your task.
To deploy a task, we recommend using the config-task.yml file, which can be easily edited in your task folder and contains more information about your task.
Using config YML
The config-task.yml is the configuration file that contains the information needed to create a task. You can find a sample config-task.yml in the root directory of your task folder.
The config-task.yml should look like this:
# Name and metadata of your task
task_name: "Your-task-name"
author: "koii"
description: "This will be description of your task"
repositoryUrl: "https://github.com/koii-network/task-examples"
imageUrl: "imageUrl"

# network value can be DEVELOPMENT , ARWEAVE or IPFS, Recommended IPFS as the cli automatically takes care of uploading the executable with the help of web3.js key
task_executable_network: "DEVELOPMENT"

# Path to your executable webpack if the selected network is IPFS and in case of DEVELOPMENT  name it as main
task_audit_program: "main"

# Total round time of your task : it must be given in slots and each slot is roughly equal to 408ms
round_time: 650

audit_window: 250
submission_window: 250

# Amounts in KOII

minimum_stake_amount: 2

# total_bounty_amount cannot be grater than bounty_amount_per_round
# total bounty is not accepted in case of update task
total_bounty_amount: 10

bounty_amount_per_round: 0.1

#Number of times allowed to re-submit the distribution  list in case the distribution list is audited
allowed_failed_distributions: 3

#Space in MBs for the account size, that holds the task data
space: 1

# Note that the value field in RequirementTag is optional, so it is up to you to include it or not based on your use case.
# To add more task variables, please refer the type, value, description format shown below

requirementsTags:
  - type: TASK_VARIABLE
    value: "SPHERON_KEY"
    description: "used to store the data"
  - type: CPU
    value: "4-core"
  - type: RAM
    value: "5 GB"
  - type: STORAGE
    value: "5 GB"

# OPTIONAL variables variables for creating task / REQUIRED variables for update task

# OPTIONAL Only provide the taskId if you are updating the task otherwise leave blank
task_id: ""

# Provide the description for changes made in new version of task
migrationDescription: ""
- Follow the instructions on the file and fill in your task's information.
Please make sure all of your environment variables are included in the requirementsTags section. Otherwise, the task will not be able to run.
For example: If you have something like:
const username = process.env.TWITTER_USER_NAME;
Then your yml file should have:
- type: TASK_VARIABLE
  value: "TWITTER_USER_NAME"
  description: "used to connect twitter"
Make sure to set your environment variable type as TASK_VARIABLE.
The value name should be the same as your environment variable name. The vital thing to remember is that the value is the actual JavaScript valid property identifier, so it needs to follow the naming rules.
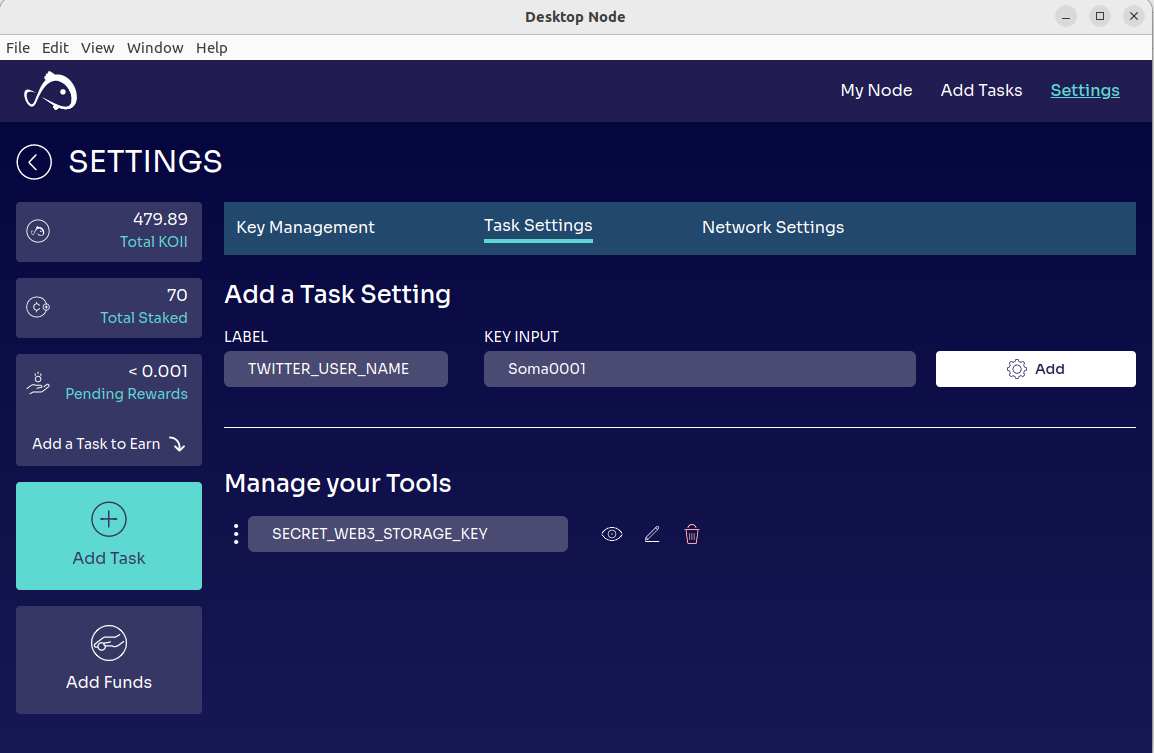
User will setup their key of the value in the Koii Node's Settings -> Task Settings
So, if you have more than one environment variable, your requirementsTags section should look like this:
requirementsTags:
  - type: TASK_VARIABLE
    value: "SECRET_SPHERON_STORAGE_KEY"
    description: "used to connect to Spheron"
  - type: TASK_VARIABLE
    value: "TWITTER_USER_NAME"
    description: "used to connect twitter"
With each environment variable having their type set as TASK_VARIABLE, a unique value and a short description.
- After updating the config file, run
npx @_koii/create-task-cli@latestagain and choose "using config YML". - If an error occurs, follow the provided instructions for correction. If successful, your terminal will display an output similar to this:
Your MetaData CID is bafybeibjbtiendwzxq3ou5hsgauyym4wcg4gtodbhssh4cxhxdipqibrrm/metadata.json

Your account will be deducted 16.96090088 KOII for creating the task, which includes the rent exemption(6.96090088 KOII) and bounty amount fees (10 KOII) ›
- Confirm by entering
yto deduct the necessary KOII amount for task creation. - You will receive details of your task, including the "Task Id" and "Stake Pot Account Pubkey."
Using the CLI
When opting for this method to deploy a new task, you will be prompted to enter all the essential information needed for task deployment.
Follow these instructions to input the required details:
Enter the name of the task: Provide a name for your task. Your choice is entirely flexible (e.g.,
Blazing-Fast-Execution).Enter a short description of your task: Enter a concise description of your task's purpose.
cautionThe description should not exceed 64 characters.
Please select the type of network: Choose IPFS for storage of your executable file, or DEVELOPMENT if you want to test in development environment.
noteThe next prompt depends on your answer to the prompt above.
[For IPFS] Enter the Spheron API key: Input your Spheron API key to store your task executable on IPFS (e.g.,
eyJhbGciOiJIUzI1NiIsInR5cCI6IkpXVCJ9....).tipCreate a Spheron Key, either set it up in your Koii Node App, see tutorial, or if you prefer set it up from CLI using Spheron API. If you already have the key setup in the Koii App you can find it in settings. , copy the token, and paste it on this prompt.
[For DEVELOPMENT] Enter the name of executable you want to run on task-nodes: Enter a desired name for your task executable, this will be the same name of the executable file that will exist in the task node's executables folder.
cautionThe name should not contain
.js. For example, if you want to runtask-mytask.js, you should entertask-mytaskas the executable name.[For IPFS] Enter the path to your executable webpack: Provide the absolute path to your executable file. E.g:
/Users/<YOUR_HOME>/Documents/testing-task/dist/main.jsEnter the round time in slots: Define the preferred number of slots per round for your task (e.g.,
1000).Enter the audit window in slots: Specify the number of slots to be allocated to the audit window (e.g.,
500).Enter the submission window in slots: Specify the number of slots to be allocated to the submission window (e.g.,
300).cautionEnsure that the audit and submission window slot numbers are lower than the slots per round.
Enter the minimum staking amount for the task (in KOII): Set the minimum amount that node operators must stake on your task (e.g.,
50).Enter the total bounty you want to allocate for the task (In KOII): Define the total bounty allocated for your task (e.g.,
1000). It should be an amount that can cover at least 4 epochs.Enter the bounty amount per round (In KOII): Total amount would be divided equally for each node until the bounty fund is exhausted (e.g.,
10).Enter the number of distribution list submission retry in case it fails: Specify the number of accepted attempts to resubmit the distribution list if the initial submission fails.
Enter TaskMetadata CID hosted on IPFS (Leave empty for None): If you've hosted the task's metadata on IPFS, enter the CID here; otherwise, leave this field empty.
Enter the space, you want to allocate for task account (in MBs): Each task would need some storage for persistence, in general in MBs (e.g.,
10).Your account will be deducted 16.96090088 KOII for creating the task, which includes the rent exemption(6.96090088 KOII) and bounty amount fees (10 KOII) › y/n
Final Confirmation: Upon final confirmation (typically by entering
y), your task will be created, and ataskStateInfoKeypair.jsonfile will be generated to manage task state information.
Strong measures should be taken to protect this JSON file.
The output of the command should be similar to the following.
✔ Select operation › Deploy a new task
create-task
✔ Enter the path to your wallet … /Users/<YOUR_HOME>/.config/koii/id.json
CONFIG {
  json_rpc_url: 'https://testnet.koii.network',
  websocket_url: '',
  keypair_path: '~/validator-keypair.json',
  address_labels: { '11111111111111111111111111111111': 'System Program' },
  commitment: 'confirmed'
}
Connection to cluster established: https://testnet.koii.network { 'feature-set': 167192737, 'solana-core': '1.10.0' }
Using account 2kG7HBGGVHZEhdbHQzvQGQUjLNGGiQvxshLu47UvnpBs containing 201.98930624 SOL to pay for fees
Using program Koiitask22222222222222222222222222222222222
✔ Select operation › using CLI
create-task-cli
✔ Enter the name of the task … my-new-task
✔ Enter a short description of your task … This is a simple task
✔ Please select the type of network › IPFS
✔ Enter the Spheron API key … eyOiJkaWQ6ZXRocjoweDNhMzJGMjdGZUFENTU0RGRDRDAyRGVFRTZmNzcyRjQxN0MzYzdkMTsIm5hbWUiOiJzYXZpbmdIaX
✔ Enter the path to your executable webpack … /Users/<YOUR_HOME>/Documents/testing-task/dist/main.js
FILEPATH /Users/<YOUR_HOME>/Documents/testing-task/dist/main.js
✔ Enter the round time in slots … 600
✔ Enter the audit window in slots … 200
✔ Enter the submission window in slots … 200
✔ Enter the minimum staking amount for the task (in KOII) … 5
✔ Enter the total bounty you want to allocate for the task (In KOII) … 10
✔ Enter the bounty amount per round (In KOII) … 1
✔ Enter the number of distribution list submission retry in case it fails … 3
✔ Enter TaskMetadata CID hosted on IPFS (Leave empty for None). …
✔ Enter the space, you want to allocate for task account (in MBs) … 5
✔ Your account will be deducted 16.96090088 KOII for creating the task, which includes the rent exemption(6.96090088 KOII) and bounty amount fees (10 KOII) … yes
Calling Create Task
Task Id: 7Rp5xL2R4jYJqEHEridRJ5kgvJbXo7oGepqKjYJEz3L
Stake Pot Account Pubkey: stakepotaccountTSbnExoJKCoQ3uPBwGtvcSEoGi2Z
Note: Task Id is basically the public key of taskStateInfoKeypair.json
Success
Whenever we refer to task account, we mean the task State Info Pubkey. The bounty amount will be present in Stake Pot Account
Once you have created a task, you can proceed to update existing tasks on the next page. Make sure you copy your Task Id and Stake Pot Account Pubkey and keep them safe.